Onyi: a Four-Servo Walking Robot STEM Kit (no glue, no soldering)
A laser-cut biped robot that walks on four SG90 servos, with an Arduino Nano on a breadboard on its head and nine graded Arduino lessons. Screws and tabs only: no glue and no soldering.
Project Overview
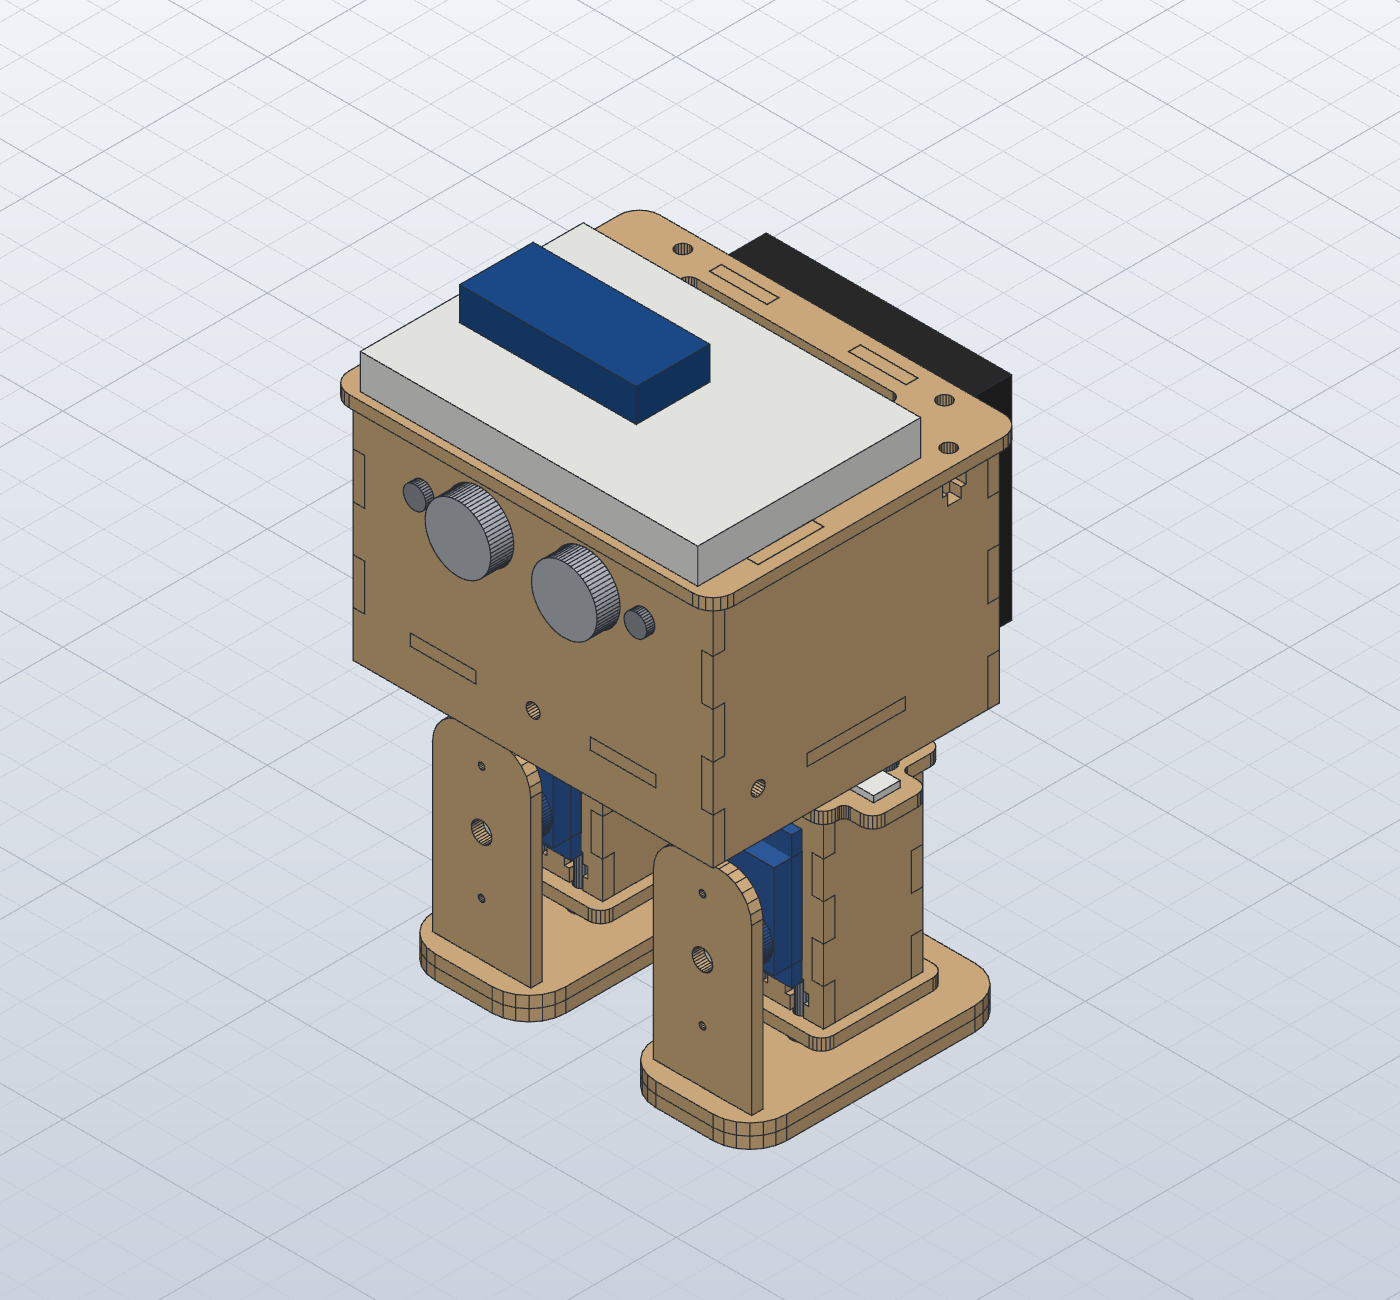
Onyi is a small walking robot made for the classroom. Every wooden part has an engraved code that matches the student booklet, and the whole robot goes together with M3 screws in T-slots and hooking tabs: no glue. The Arduino Nano sits on a breadboard on the robot's head, so wiring is push-in, with no soldering.
Nine graded Arduino lessons take students from blinking an LED to walking, turning, measuring distance, avoiding obstacles, and finally designing a dance for their robot.
Designed and checked, not built yet
Every part, fit and motion in this kit was checked by script, but nobody has built one yet. Part sizes are typical values: measure yours and cut the fit test before the full sheets.
At a glance
| Specification | Value |
|---|---|
| Size | 143 mm tall to the top of the Nano, body 88 x 70 mm, feet 32 x 64 mm |
| Mass (calculated) | About 278 g with batteries |
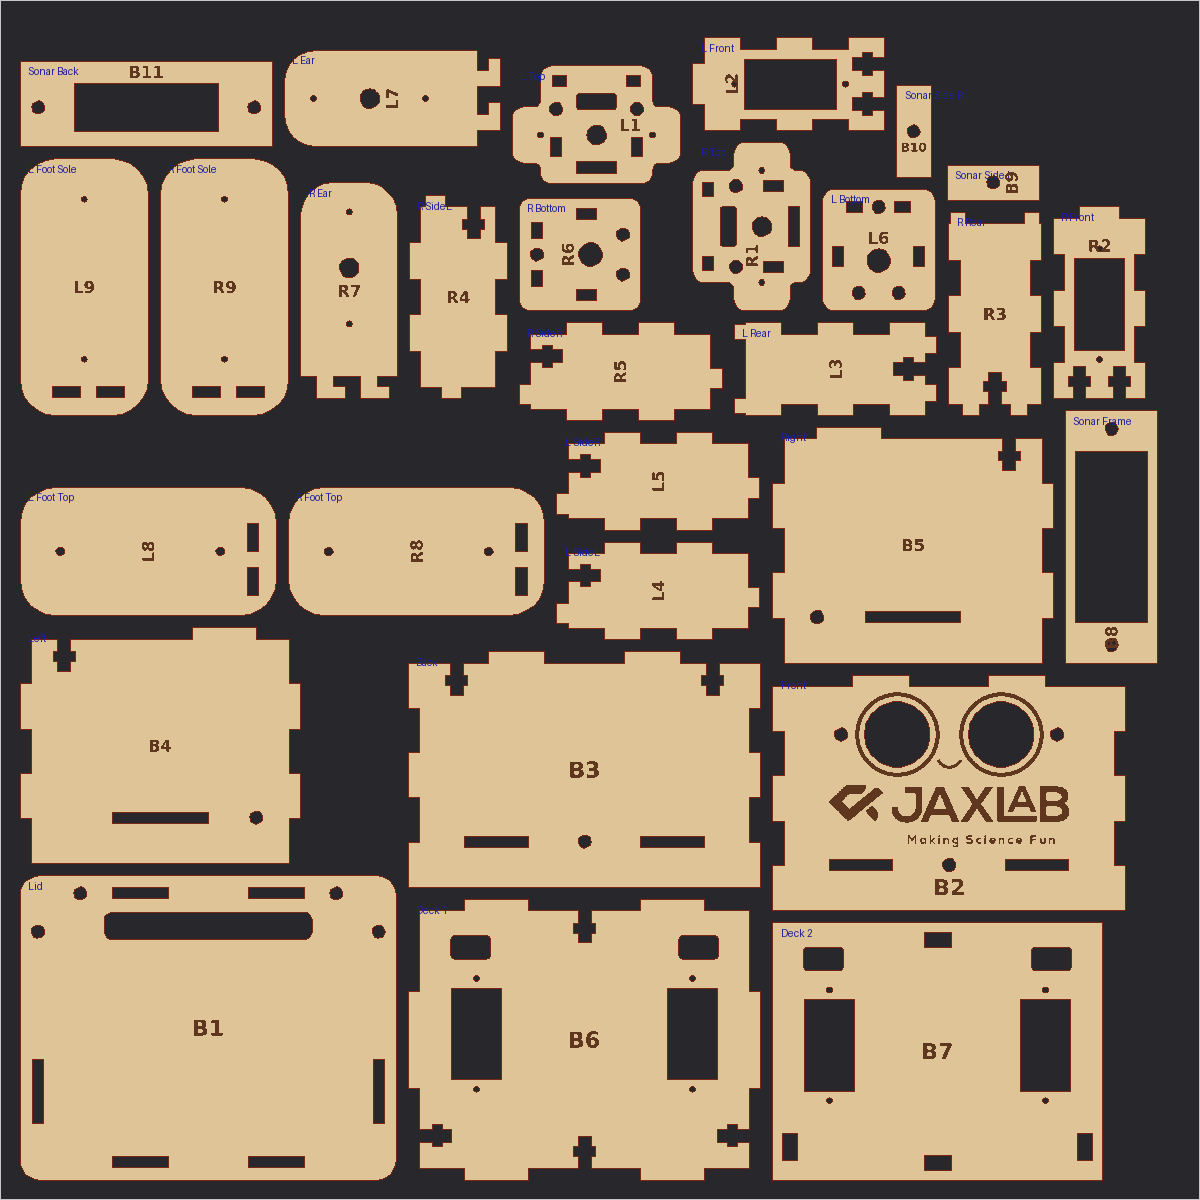
| Wood | 29 parts on one 300 x 300 mm sheet of 2.8 mm plywood |
| Ankle load | 46 % of an SG90's stall torque |
| Power | 4 x AAA NiMH (4.8 V). Never alkaline: 6 V is above the Nano's 5V-pin limit |
| Price | ₦45,000 per box (Hack Pack, see Subscribe) |
| Class | JSS1 to SS3 |
Simulated walk
Before cutting anything, we ran the lessons' walking code in a physics simulation built from the kit's real parts and weights, with each joint behaving like an SG90. Onyi walks about 28 mm per step, lifts each foot about 10 mm, and never fell. The turning code in Lessons 6, 8 and 9 came out of this simulation.
Downloads
| File | Use |
|---|---|
| Fit test G-code | Servo opening, horn holes, a T-slot with its nut, sensor holes |
| Sheet G-code | All 29 parts on one sheet (engrave codes, then cut) |
| Student build booklet (PDF) | 20 pages, every step drawn from the real parts |
| Arduino lessons L01 to L09 | One idea per lesson, all compile for the Nano |
| CAD files | STEP model, SVG and DXF sheet for LightBurn |
🛒 Materials Needed
- 1 sheet of 2.8 mm plywood, 300 x 300 mm
- 4 SG90 servos (MG90S for kits reused year after year)
- Arduino Nano (ATmega328P) and USB cable
- Half-size breadboard and jumper wires
- HC-SR04 ultrasonic sensor
- Passive buzzer
- 2200 uF capacitor
- Snap-off male header pins (for the servo plugs)
- 4 x AAA switched battery box and 4 AAA NiMH cells (never alkaline)
- 18 M3 x 10 screws and M3 nuts, 2 M2 screws
- Hook-and-loop tape
📋 Step-by-Step Instructions
Cut Fit test G-code first: it has the servo opening, the horn screw holes, a T-slot with its nut pocket, and the sensor holes. Check that an M3 nut drops into the pocket and a screw pulls the joint tight.
Then cut Sheet G-code. It engraves the face and every part code, then cuts all 29 parts.
Step Images
All 5 steps completed — great work!